
Blue Pippin Size Selection
Size Selection of 525-600 bps on all pools
Dates Performed: July 20th Pools 1,2,3,4,5 July 22nd Pool 2
Blue pippin protocol:
Take out the electrophoresis buffer and marker V1 from the fridge ~30 minutes before use so they can come to room temperature
Label new strip tubes for each pool to be size selected
Transfer 30ul of each ligation pool into their new strip tube
Add 10ul of Marker V1 to each tube with 30ul of pooled samples. Vortex and spin down the tubes
Items to bring to the Blue Pippin bench:
p20 pipette and p20 tips
2 cassettes just in case one continuously fails tests
electrophoresis buffer
samples
gloves
pamphlet about the bluepippin from the cassette box
Strip tubes for storing the sample after size selection
0.1% tween
Sharpie
In the GSC, plug in the BluePippin and turn it on (button on back) wait for the computer to boot up
Calibrate the machine: place the calibration fixture black side down on the electrodes, close the lid and press calibrate on the software. The calibration fixture is a pink plastic rectangle, it’s stored in a knit sock in one of the drawers next to the BluePippin
Take out a cassette and inspect carefully, tap away any bubbles behind the elution chambers, make note if this cassette has some used wells, look to see if all buffer chambers are full, look for breaks or cracks in the gel (look at manual for pictures here to guide you)
Place the cassette in the nest with the elution wells on the right. Remove the sticker seals
One by one, in each elution well, remove the liquid in there and discard (should be 40-50ul) and replace with 40ul of fresh electrophoresis buffer. Use a p20 for this because it has thin tips
Check sample well buffer levels to make sure they are full of electrophoresis buffer. Add in more if needed
On the software, perform the continuity test by pressing “TEST”. The cassette must pass all lanes you are going to use, if some lanes have been run before it’s ok if those fail, if it fails unused lanes, remove and replace all buffer in elution wells and try test again. If it continues to fail, use a different cassette
To load, remove 40μl of buffer from each sample well to be used and replace with the 40uL of sample/Marker V1 solution. Do this one well at a time. Be mindful that the wells are numbered 1-5 on the cassette from the bottom up
Select program in the software or go to the protocol manager tab and create a new one
Make sure reference is set to internal for all lanes, if some lanes are not to be used turn the reference off on just those lanes
Make sure the range of bp is what you want
Make sure the marker on the top dropdown window is V1!
Re-inspect the settings on the main page and name lanes if you want to. Press start if all is good
The program will stop when elution is finished, it’s good to check back in an hour or 2 hours
Once done, remove the entire volume from the elution wells and place into new tubes, volumes range between ~35-50ul
To get out any extra, add 40ul 0.1% tween to each elution well, wait 1 minute, and remove into separate tubes. In theory a % of the sample is recovered with a rinse with tween
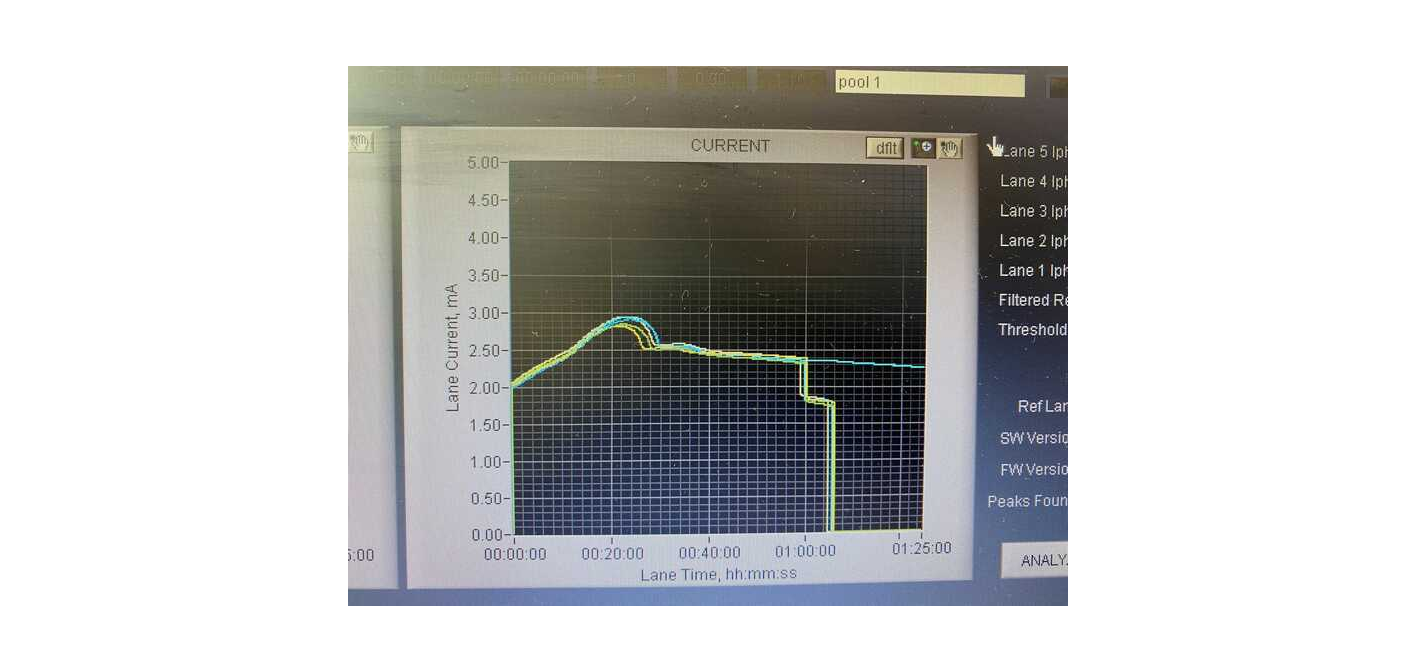
Review the run log to ensure that the standards were observed, if it didn’t detect peaks then it won’t elute that lane ever, so you might as well just stop it. Also look for spikes in the voltage early in the run: voltage near or above 2.5mV cause the DNA to run at unpredictable rates (despite the internal standards). If spikes are observed, check the size of the final library (post-PCR) and/or the pre-PCR elution on the TapeStation
Samples can be frozen at -20 degrees C if not being used immediately
July 20th:
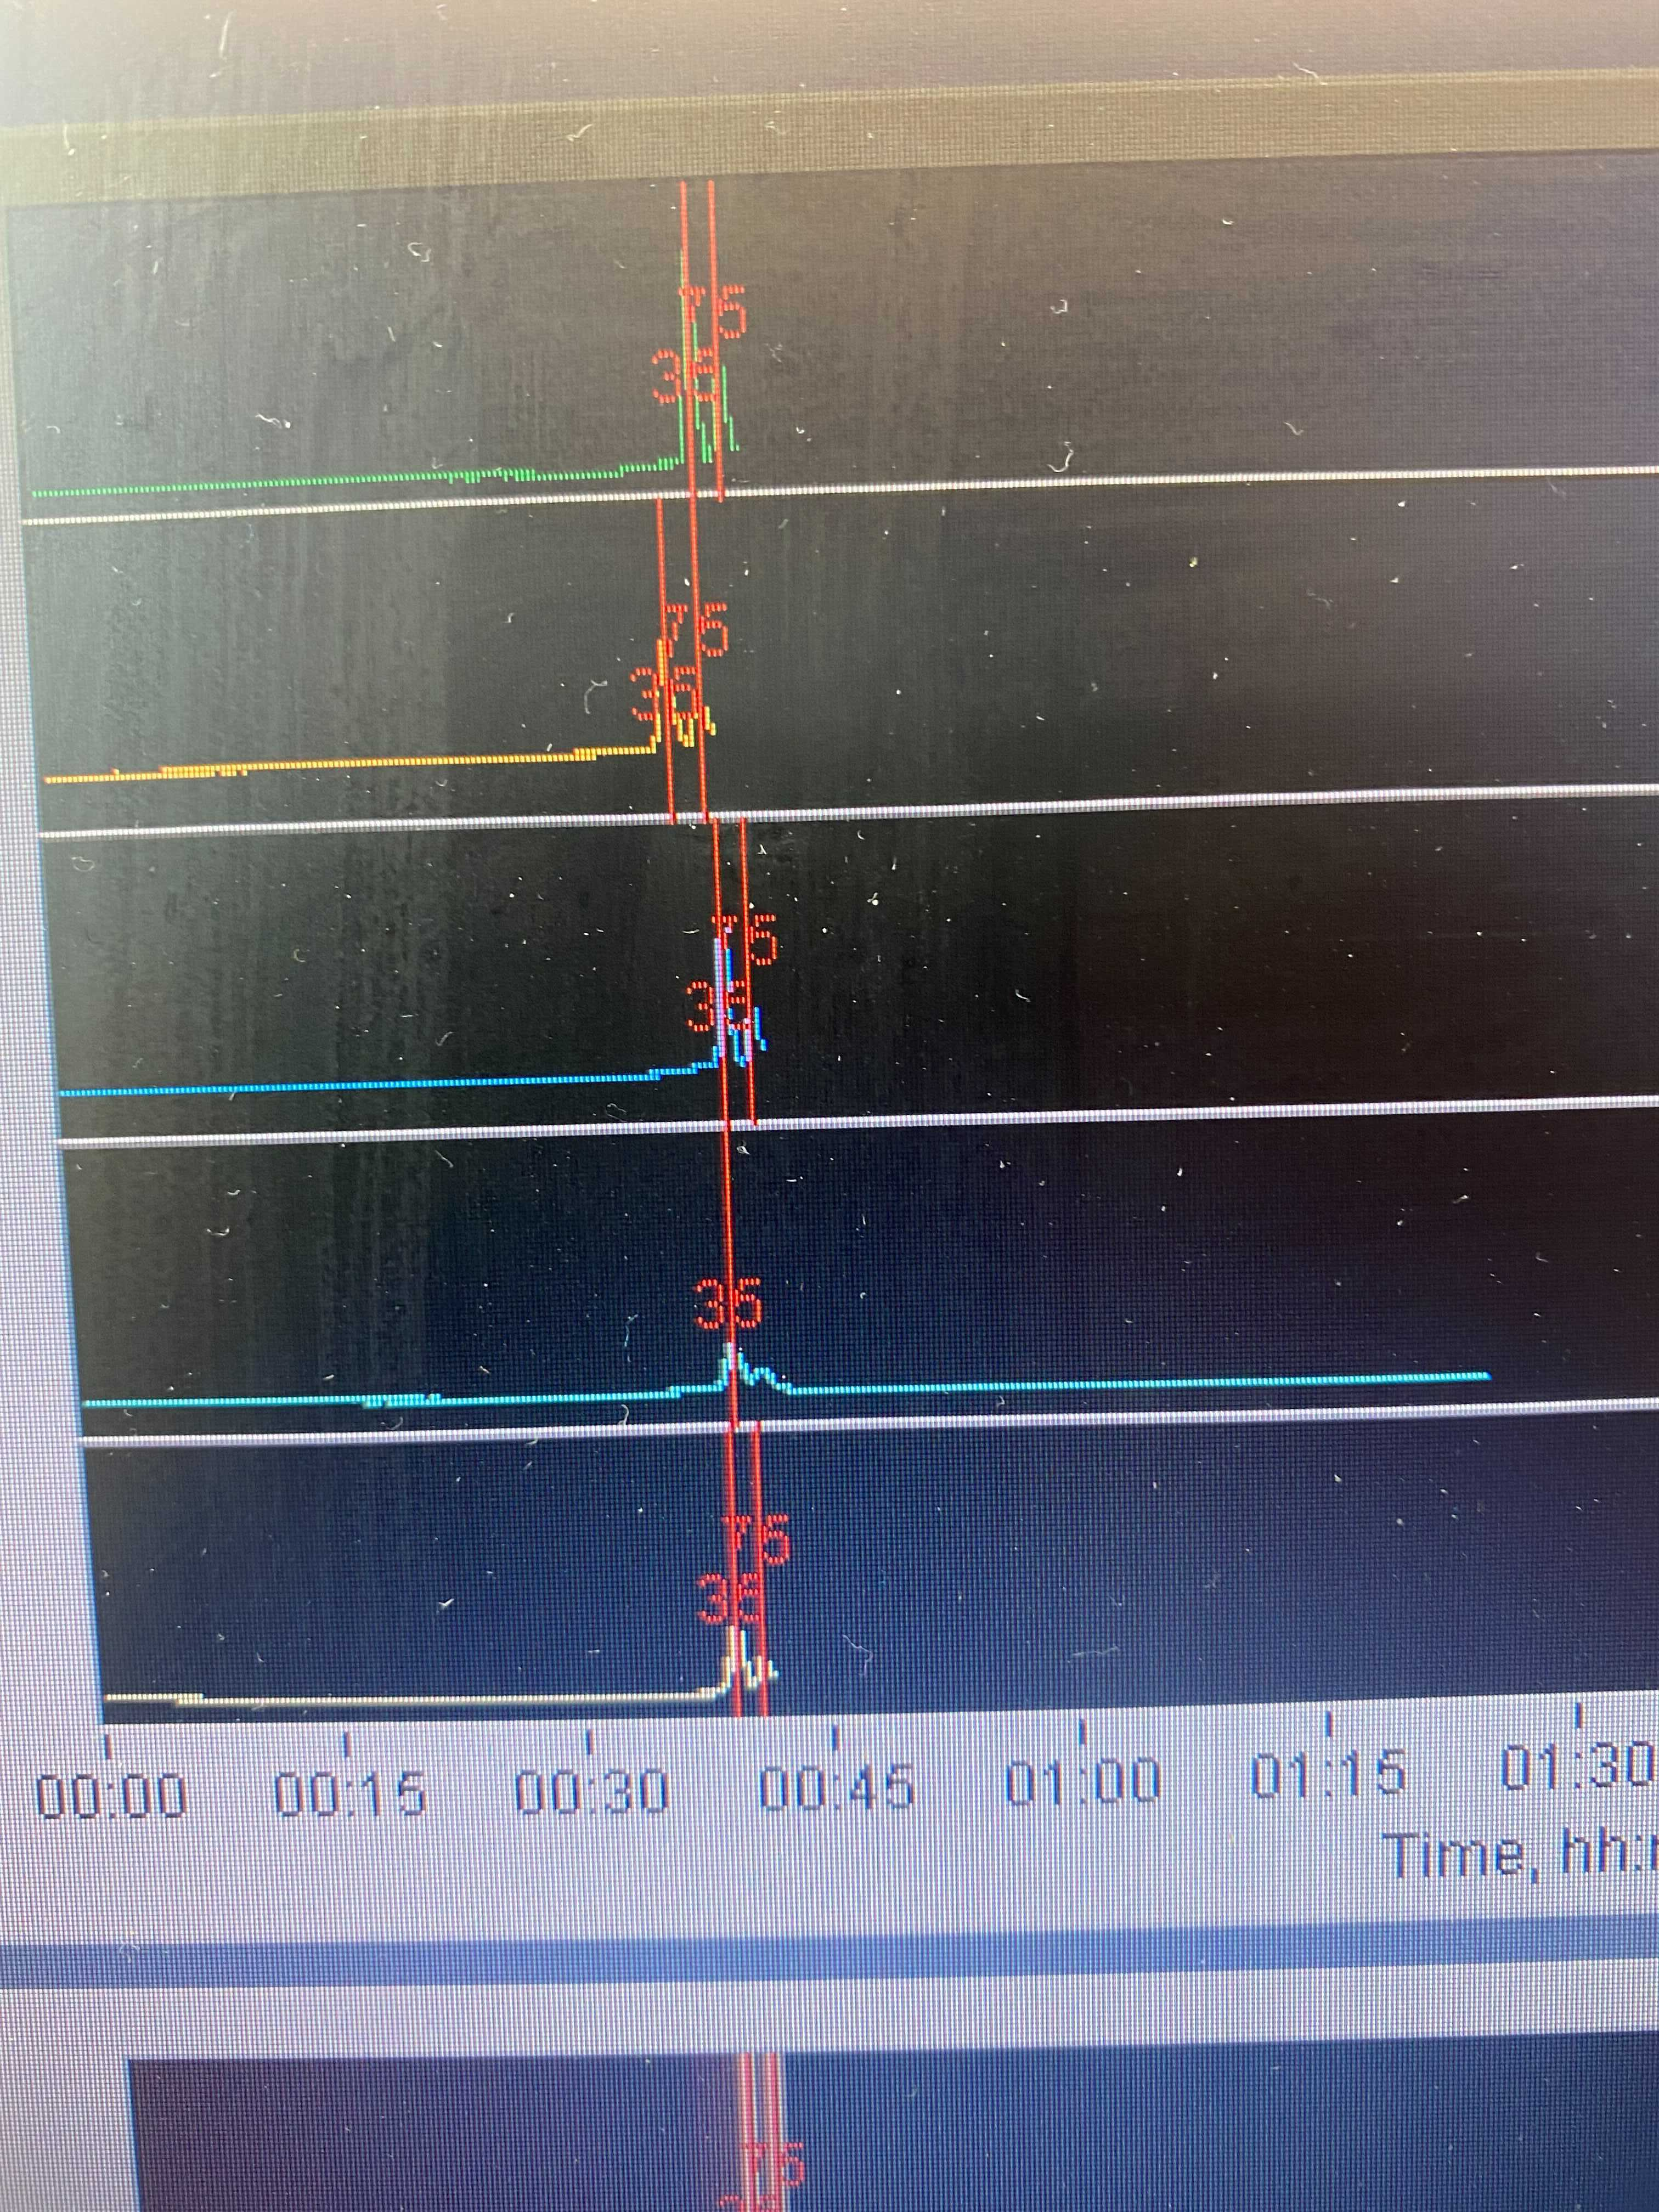
Pools were set up in cassette 1-5 with 5 being the top and 1 being the bottom. The second bp marker (75) was never detected in pool 2’s lane so the machine never switched to elution.
July 22nd:
Pool 2 was run in a new cassette in the top lane (5)